SET UP ONCE. WORK FROM ANYWHERE.
Your PC. Connected.
Install the runner on your Windows PC. Then upload and start assessments
from your phone or computer.
WATCH THE WALKTHROUGH
From setup to your first assessment
▶Setup video coming soon
Follow the three steps below to get started.
1
Install on your PC
On your Windows 10 or 11 PC, download and open the installer. Follow
the steps on screen.
Download most recent AutoDEAP Runner
Use a trial, pack or subscription. Internet is required during setup.
2
Approve your PC
The runner opens this page. Sign in and select
Connect this PC to my account.
Already connected? Updates keep your connection. The runner starts
when you sign in to Windows.
3
Start an assessment
Add your BER IDs in your account.
Open your workspace on any device, upload and check your calculations,
then choose your PC and assessor. Enter the DEAP password and start.
Keep your Windows PC awake and online. Review the saved assessment in
DEAP afterwards. Check all entries, add space heating information and upload supporting evidence. You can open the completed assessment on your phone in landscape mode.
CLEAR INPUTS. BETTER RESULTS.
What should I upload?
Use a sharp, straight photo with all measurements visible. Give each
assessment a clear name and use it for every related upload.
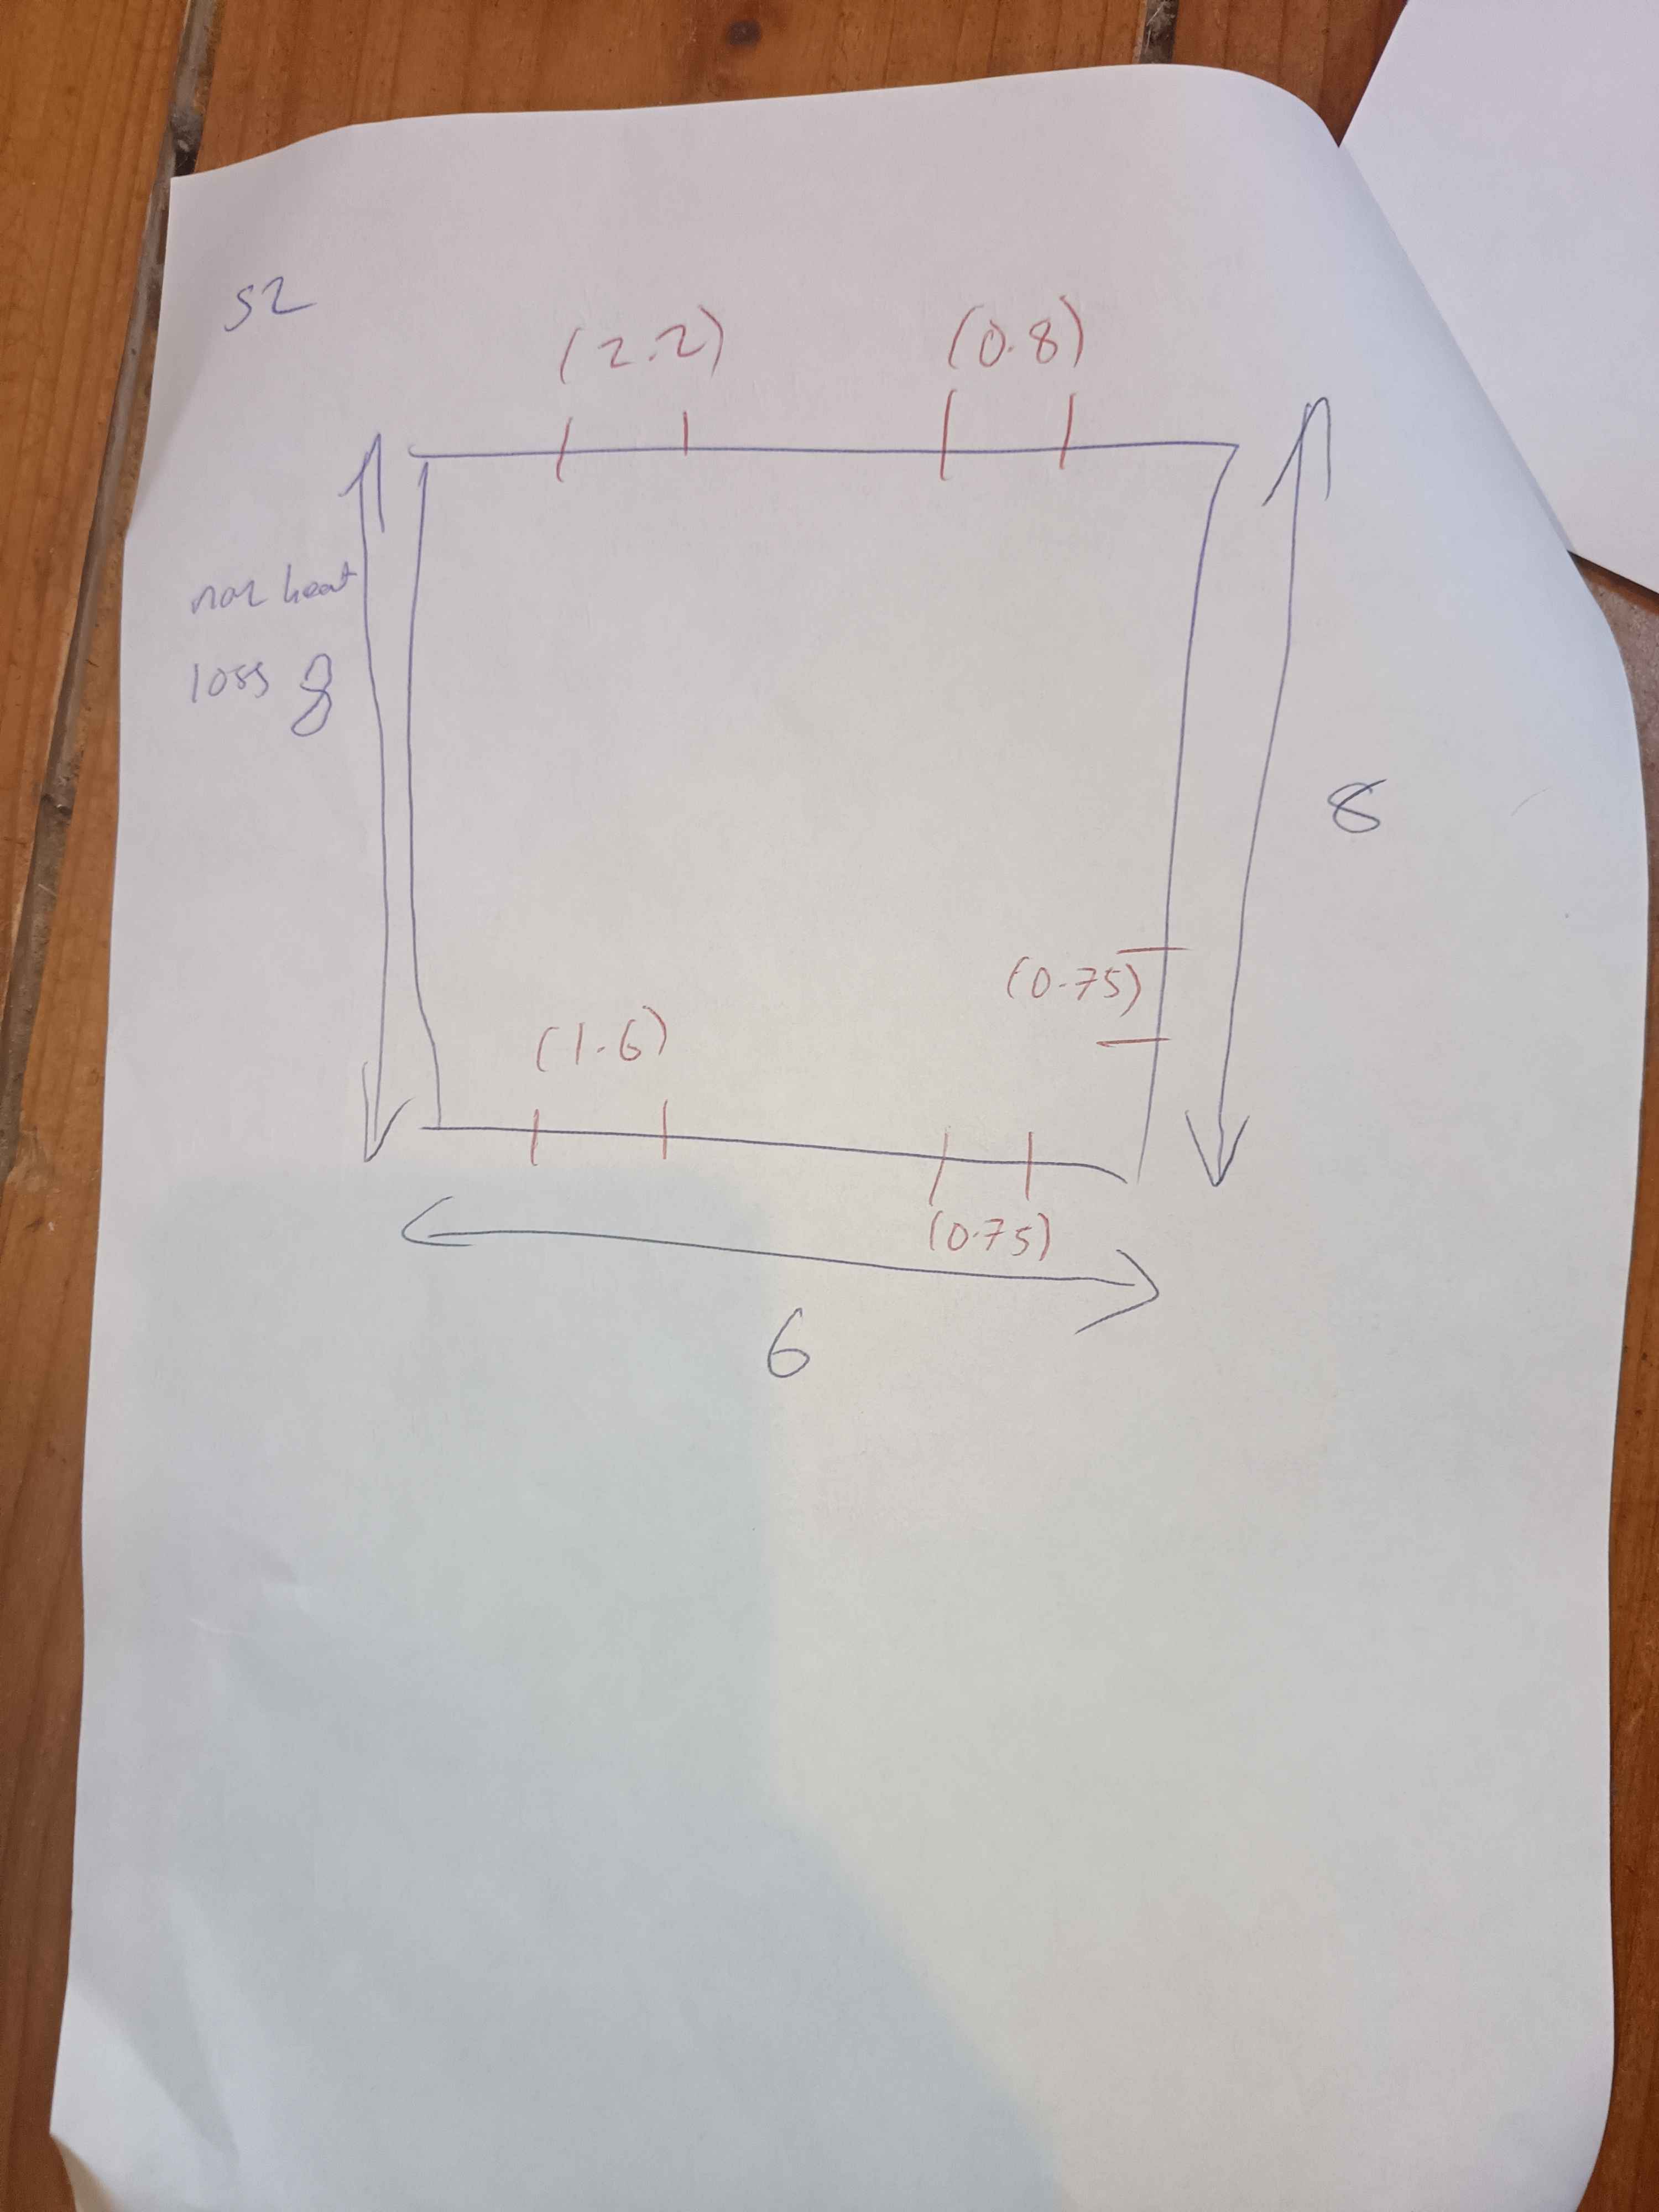
Floorplan
Show lengths, window areas and non-heat-loss walls. Upload and analyse the ground floor first, then first floor, then second floor. Use the same assessment name, choose the correct floor label, and analyse each image before moving to the next. Keep the same floor label when reanalysing a corrected image.
Survey form
Download survey form
Example placeholder until the full survey form is supplied.
Upload a readable form, even if some fields are incomplete. Include the living room area in m² where available. AutoDEAP keeps readable information and lists what needs checking.
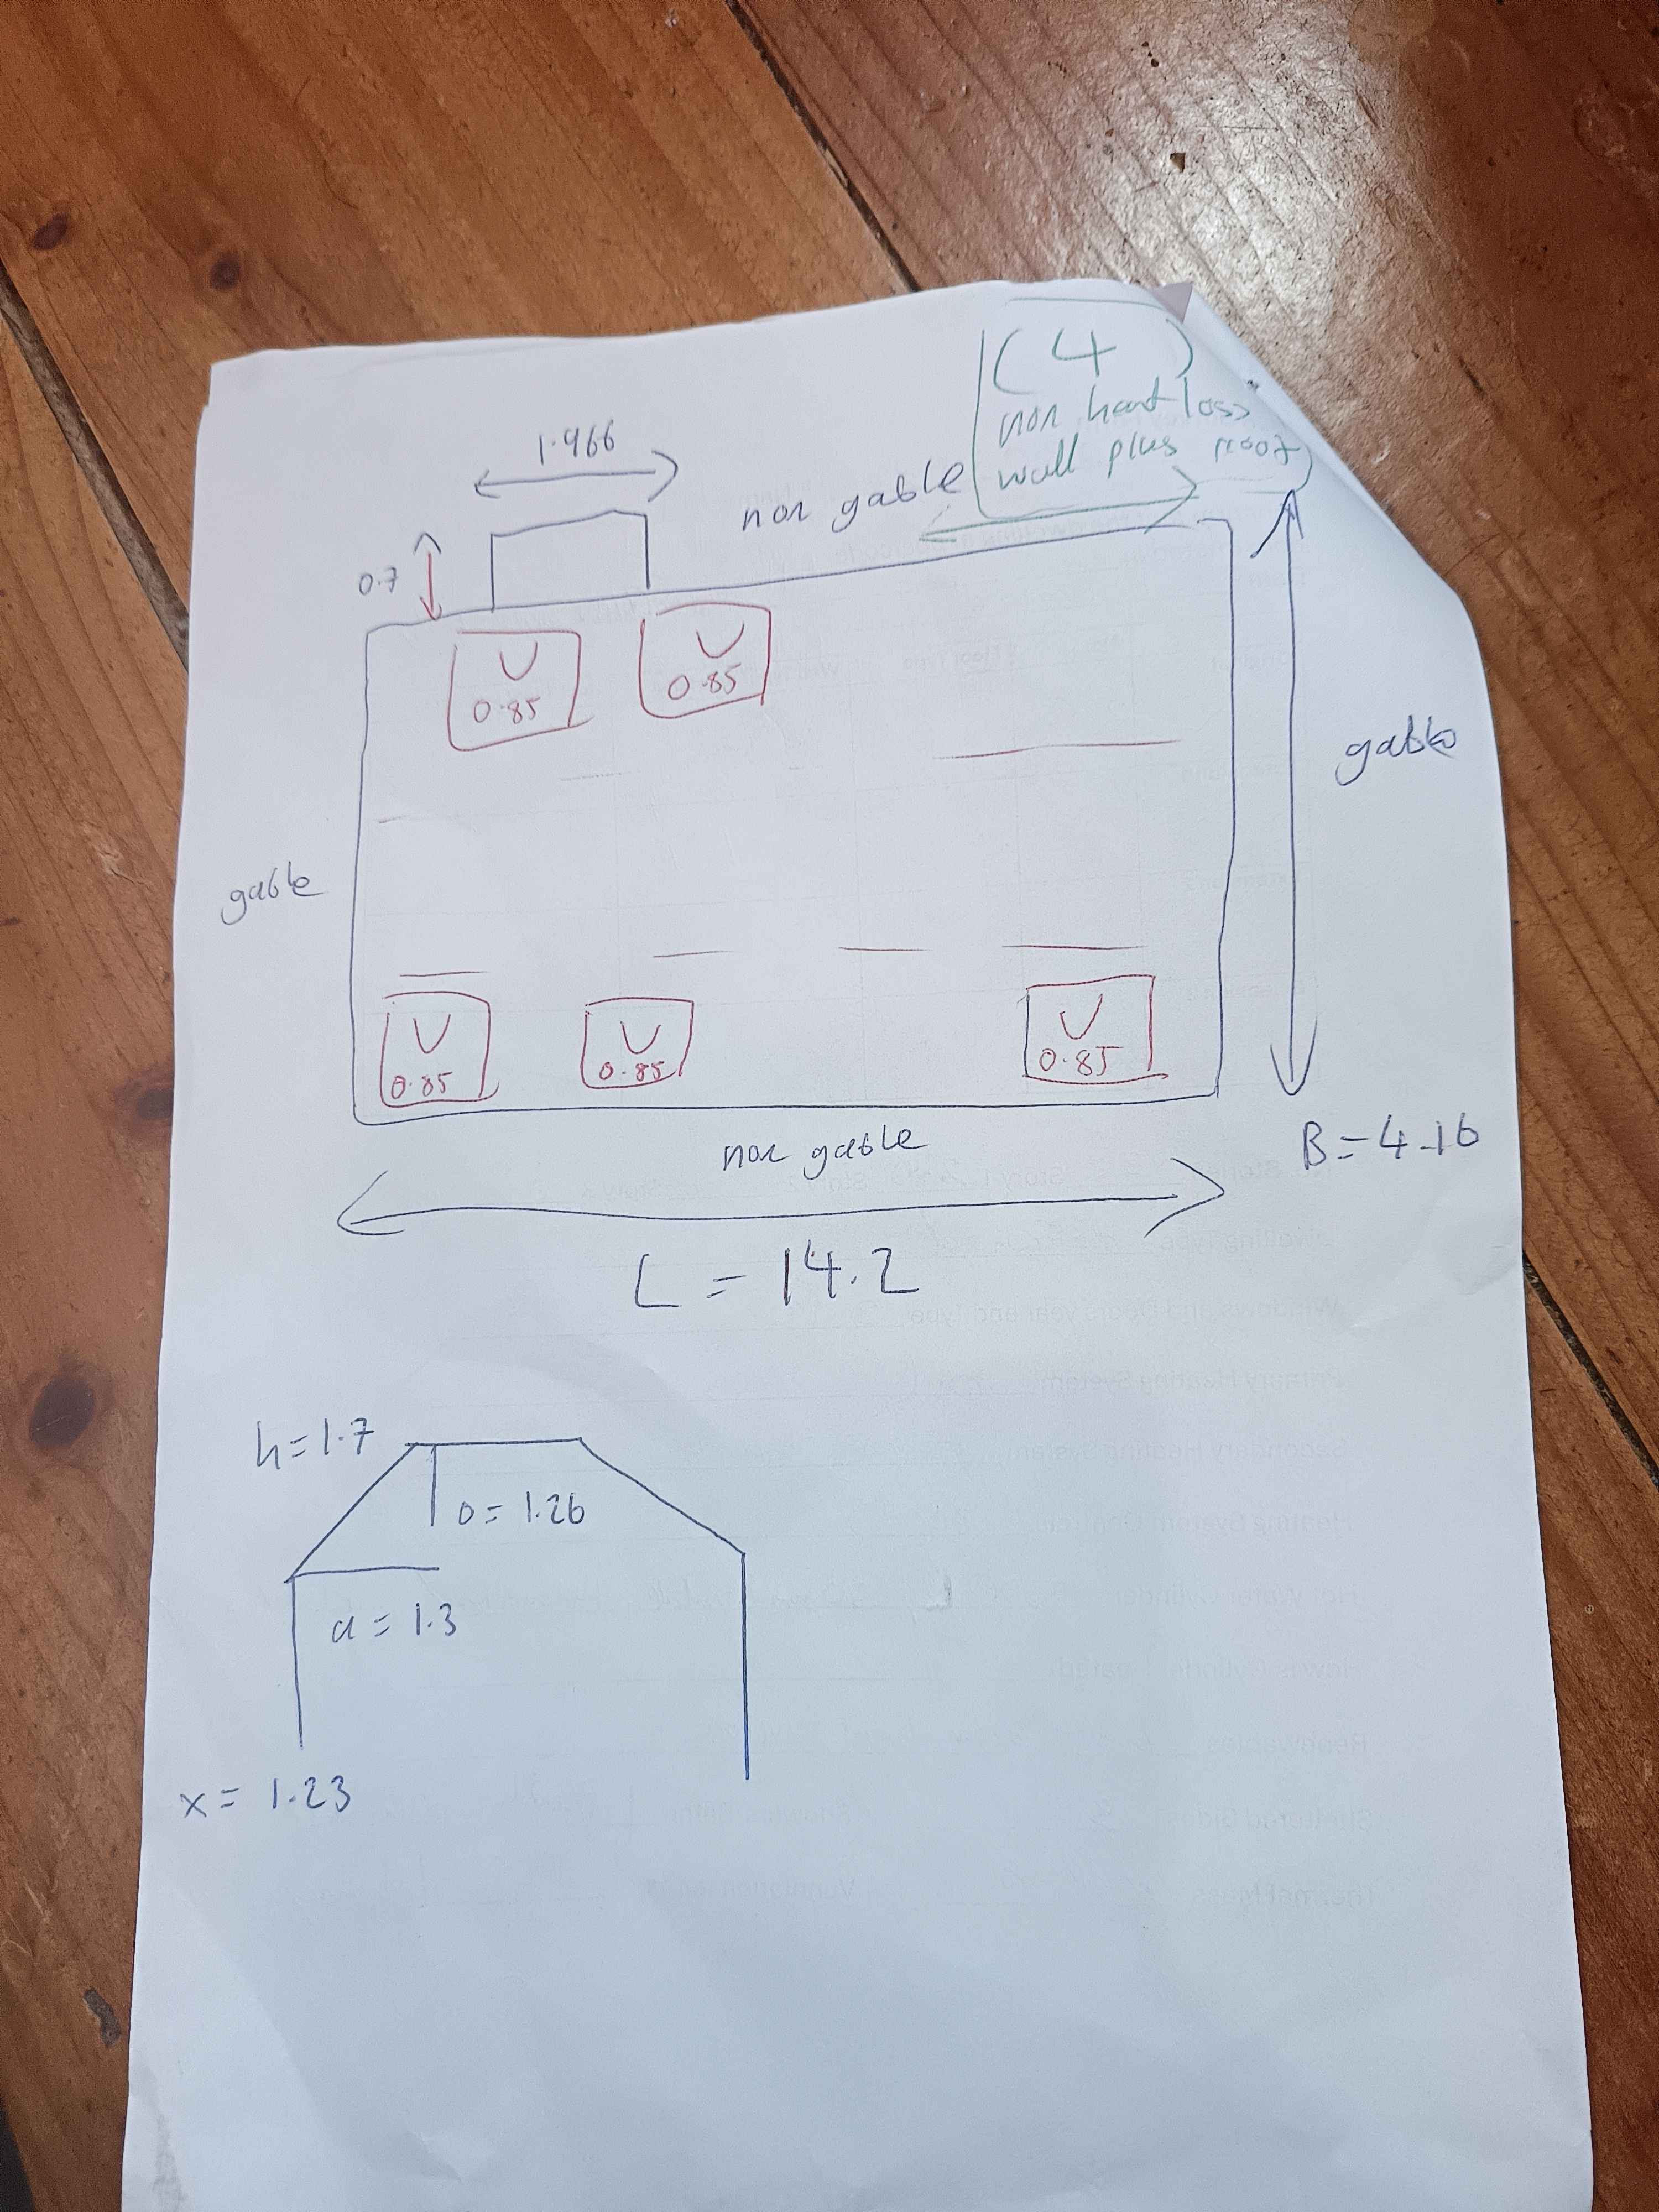
Roof sketch
Floors with sloping roofs must be uploaded under Roof analysis, after the standard floors. Do not also upload that floor as a normal floorplan. Include dimensions, slopes and roof windows. Keep relevant
cross-sections in the image.
Add a missing measurement
Choose an image in your workspace, select
Draw / add notes, then use your finger or mouse to draw
or place text. Select
Save & use edited image before analysing. Your
source and edited revisions remain in Previously saved images.
Updating or getting help
Install the latest version
Finish or cancel active work first. Download and run the latest
installer on the same Windows account. It replaces the software and
preserves your connection, keys and local job files. Do not run the
old extracted runner folder afterwards.
My PC is offline
Wake your PC, check its internet connection and open
AutoDEAP Runner from the Start menu. Refresh PCs in
the workspace. If your account connection was revoked, approve it
again in the browser.
Where are the logs?
Open AutoDEAP Runner logs from the Start menu. Each
job folder contains its calculations and automation.log. A paused section on a survey page also save a local screenshot and last-failure.json; these stay on your PC.
Do not restart a paused assessment without checking DEAP for a partial
survey.
Installer or browser setup needs attention
The installer identifies the step to check. Check your connection and try
again. Google Chrome can be used if the Chromium download is
unavailable. This development installer is unsigned, so Windows may
show a publisher warning; only use the download from your AutoDEAP
account.